
Have you ever wished you could block ads on all your devices without installing software on each one? Or wanted to access your home network securely while traveling? In this post, I'll share how I tackled both challenges with a single Raspberry Pi solution.
The Problem
Individual ad blockers are great, but they:
- Need to be installed and maintained on each device
- Don't work on smart TVs, IoT devices, or mobile apps
- Can be bypassed by increasingly sophisticated ad delivery systems
Additionally, I wanted secure remote access to my home network without relying on third-party VPN services.
The Solution: Raspberry Pi + AdGuard Home + WireGuard
I decided to create an all-in-one solution using:
- A Raspberry Pi 4 as the hardware platform
- AdGuard Home for DNS-level ad blocking
- WireGuard for a lightweight, secure VPN
Installing and Accessing Raspberry Pi OS
The first step was setting up the Raspberry Pi with a headless installation of Raspberry Pi OS Lite, which doesn't require a monitor or keyboard:
- Downloaded and flashed Raspberry Pi OS Lite to a microSD card using Raspberry Pi Imager
- Inserted the microSD card into the Raspberry Pi and connected it to power and ethernet
After the initial boot (which takes about a minute), I needed to locate and access the Pi on my network:
- Accessed my router's admin panel (typically at 192.168.1.1)
- Found the Raspberry Pi in the list of connected devices (usually shows up as "raspberrypi")
- Noted its assigned IP address
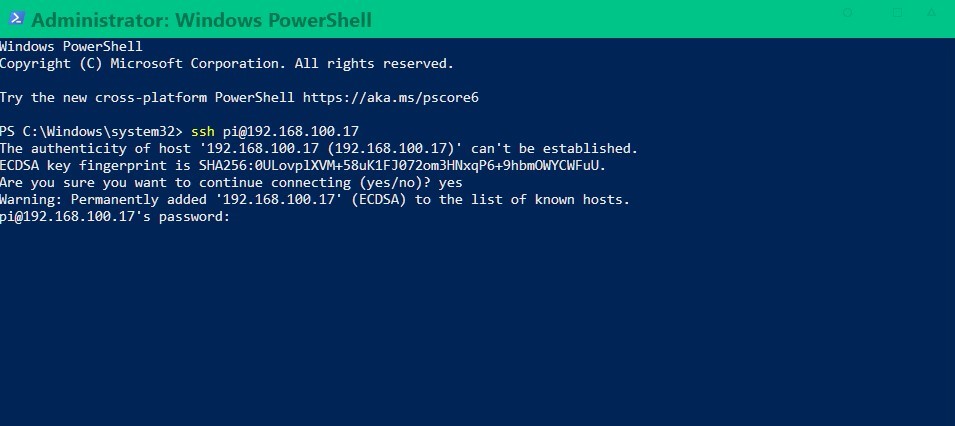
- Opened a terminal on my computer and connected via SSH:
ssh pi@192.168.1.x # Replace with the actual IP address- Confirmed the SSH fingerprint by typing "yes" and entered the default password ("raspberry")
- Updated the system packages immediately:
sudo apt update -y && sudo apt upgrade -y- Rebooted to apply all updates:
sudo rebootAfter reconnecting via SSH, my Raspberry Pi was ready for installing AdGuard Home and other software.
Setting Up AdGuard Home
AdGuard Home works by acting as a DNS server that filters requests to ad servers. When any device on your network tries to load an ad, AdGuard intercepts the DNS request and blocks it.
Installation Process
I chose to install the stable version of AdGuard Home for better reliability:
- Connected to the Raspberry Pi via SSH and ran the official installation script:
curl -s -S -L https://raw.githubusercontent.com/AdguardTeam/AdGuardHome/master/scripts/install.sh | sh -s -- -v-
After the installation completed, the terminal displayed links to access the AdGuard Home web interface.
-
I navigated to the provided URL in my browser (typically http://<raspberry_pi_IP>:3000).
-
During the initial setup, I selected the eth0 network interface in the "Listen Interfaces" option to ensure AdGuard would work across my entire network.
-
Set up an admin username and password for the web interface.
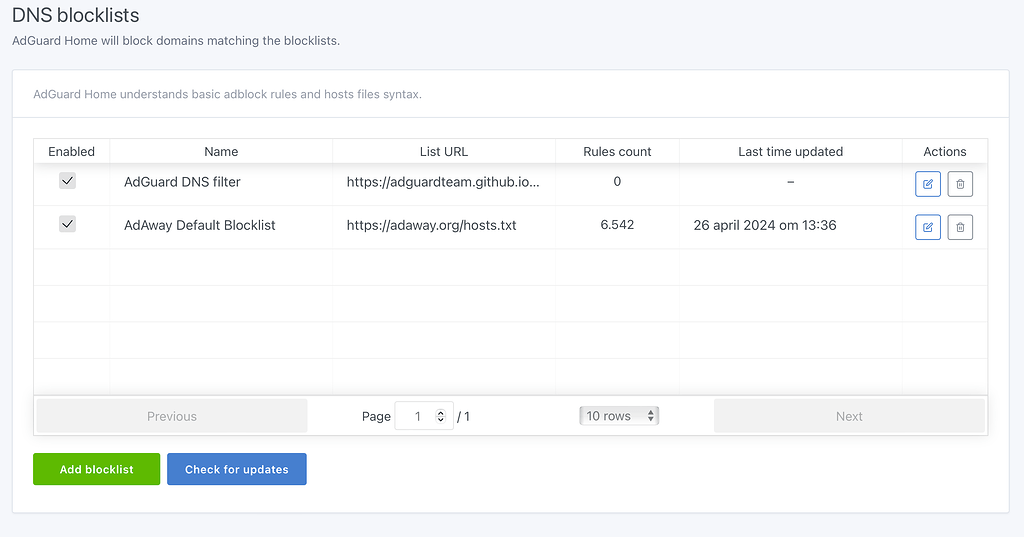
Configuring DNS Blocklists
The real power of AdGuard Home comes from its blocklists. I set up multiple comprehensive blocklists:
-
In the AdGuard Home admin panel, I navigated to "Filters" → "DNS blocklists"
-
Added these essential blocklists:
- AdGuard DNS filter
- AdAway Default Blocklist
- Peter Lowe's Ad and tracking server list
Managing False Positives
Sometimes blocklists can be too aggressive and block legitimate websites. To handle this:
- When a site was incorrectly blocked, I would check the "Query Log" section
- Locate the specific query by looking for the client IP and timestamp
- Hover over the query and click the "Unblock" option
- This automatically created an exception rule in "Custom filtering rules" in the format:
@@||example.com^$important
I could also manually add exceptions in the "Custom filtering rules" section for sites I knew needed to be whitelisted.
Monitoring and Statistics
AdGuard Home provides excellent analytics on your network traffic:
- The Dashboard shows the percentage of blocked queries
- The Query Log helps identify problematic domains
- The Statistics section reveals which clients generate the most requests and which domains are queried most frequently
This data helped me fine-tune my setup and identify potential issues on my network.
Configuring WireGuard VPN
WireGuard is an extremely efficient VPN protocol that's perfect for a Raspberry Pi. I set it up to allow secure connections to my home network from anywhere, encrypt all traffic when on public Wi-Fi, and route DNS requests through AdGuard even when away from home.
Setting Up Dynamic DNS
Most home internet connections don't have a static IP address - your ISP assigns a new one periodically or when your router restarts. This creates a problem: how will your VPN clients know where to connect if your IP address keeps changing?
The solution is to set up a Dynamic DNS service:
-
I created an account on Dynu.com
-
Added a new domain (e.g., myhomepi.freeddns.org)
-
Installed
ddclienton my Raspberry Pi:sudo apt-get install ddclient -y -
Configured ddclient by editing
/etc/ddclient.conf:sudo nano /etc/ddclient.conf -
Added the following configuration:
# Check every 10 minutes daemon=600 # Log update msgs to syslog syslog=no # Record PID in file pid=/var/run/ddclient.pid # Get IP from web service use=web, web=checkip.dynu.com/, web-skip='IP Address' # IP update server server=api.dynu.com protocol=dyndns2 # My credentials login=MYUSERNAME password=MYPASSWORD MYDOMAINNAME -
Started the ddclient service:
sudo systemctl restart ddclient && sudo systemctl start ddclient
This ensures that my domain always points to my current IP address, even when it changes.
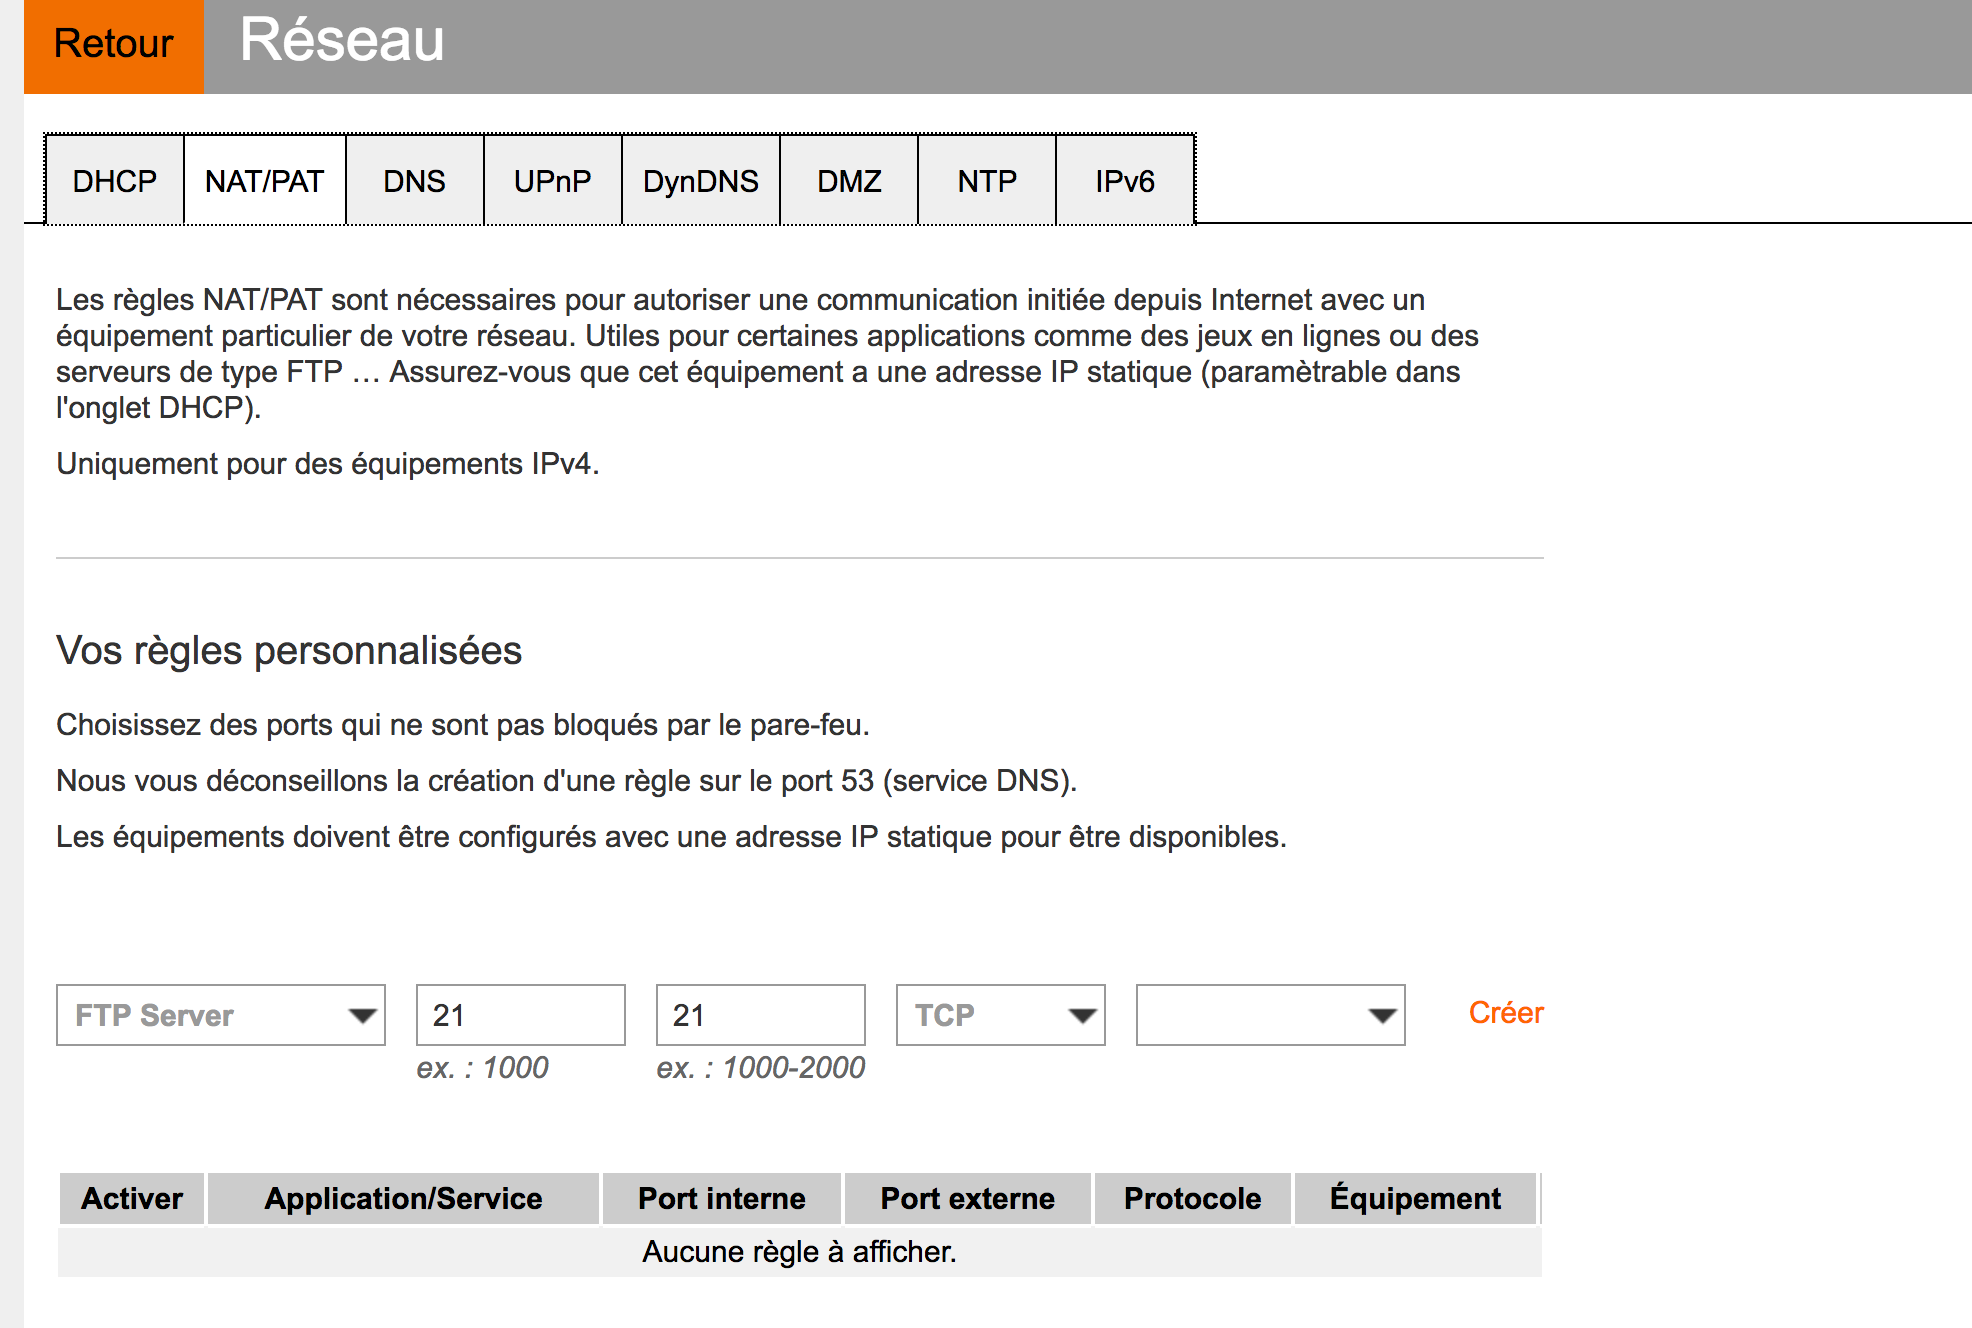
Setting Up Port Forwarding
For the VPN to be accessible from the internet, I needed to configure port forwarding on my Orange router:
- Accessed the router's admin interface
- Located the port forwarding settings
- Created a new rule with these settings:
- Device: Raspberry Pi's internal IP (e.g., 192.168.1.2)
- Protocol: UDP
- Port range: 51820
- Outgoing port: 51820
- Authorized external IPs: All
Installing WireGuard
With the prerequisites in place, I installed WireGuard using a convenient script:
wget https://git.io/wireguard -O wireguard-install.sh && sudo bash wireguard-install.shDuring installation, I:
- Entered my dynamic DNS hostname (e.g., myhomepi.freeddns.org)
- Used the default port (51820)
- Created my first client profile
- Selected Cloudflare's DNS (1.1.1.1) initially, though I later changed this to point to AdGuard
The script automatically generated a client configuration file and displayed a QR code for easy mobile setup.
Adding Multiple Client Devices
Each device that connects to the VPN needs its own client profile. To create additional profiles, I simply re-ran the script:
sudo bash wireguard-install.shWhen prompted, I selected "Add a new client" and gave each device a unique name.
Setting Up Clients
Android and iOS
- Installed the WireGuard app from the app store
- Tapped the "+" button and selected "Scan from QR code"
- Scanned the QR code displayed in the terminal
- For Android, enabled "Use kernel module backend" in settings for better performance
- Modified the DNS settings to point to my Raspberry Pi's IP address for ad blocking
Windows
- Downloaded and installed the WireGuard client from wireguard.com
- Viewed the configuration file contents:
sudo cat /root/clientname.conf - Copied the text to a new file on my Windows PC and saved it with a
.confextension - In the WireGuard client, clicked "Import tunnel(s) from file" and selected this file
- Edited the configuration to change the DNS server to my Raspberry Pi's IP address
Integrating WireGuard with AdGuard Home
The final step was ensuring all DNS queries through the VPN were filtered by AdGuard Home:
- In each client configuration, I modified the DNS setting to point to my Raspberry Pi's internal IP address
- In the server configuration (
/etc/wireguard/wg0.conf), I added DNS forwarding rules:PostUp = iptables -t nat -A PREROUTING -i wg0 -p udp --dport 53 -j DNAT --to-destination RASPBERRY_PI_IP:53 PostDown = iptables -t nat -D PREROUTING -i wg0 -p udp --dport 53 -j DNAT --to-destination RASPBERRY_PI_IP:53
This setup ensures that even when I'm away from home, my devices benefit from the same ad blocking and privacy protection as when they're on my home network.
Maintaining the VPN
To manage the WireGuard server, I can re-run the installation script which provides options to:
- Add new clients
- Remove existing clients
- Update the server settings
The script handles all the complex configuration, making management straightforward.
The Orange Router Challenge
The trickiest part of this project was configuring my Orange router to work with both AdGuard Home and the TV decoder. The main challenge is that the Orange TV decoder requires specific DNS settings to function properly, which conflicts with network-wide ad blocking.
Detailed Configuration Steps for Orange TV Compatibility
Here's my step-by-step solution to make everything work together:
1. Restrict the Orange Router's DHCP Server
First, I needed to limit the DHCP server on the Orange router to only assign IPs to specific devices:
-
Connected only my Raspberry Pi and the TV decoder to the network
-
Accessed the router configuration page (usually 192.168.1.1)
-
Located the DHCP server settings and configured them as follows:
- Router IP address: 192.168.1.1
- Subnet mask: 255.255.255.0
- Starting IP address: 192.168.1.2
- Ending IP address: 192.168.1.3
-
Added static DHCP leases for both:
- The Raspberry Pi running AdGuard Home
- The Orange TV decoder
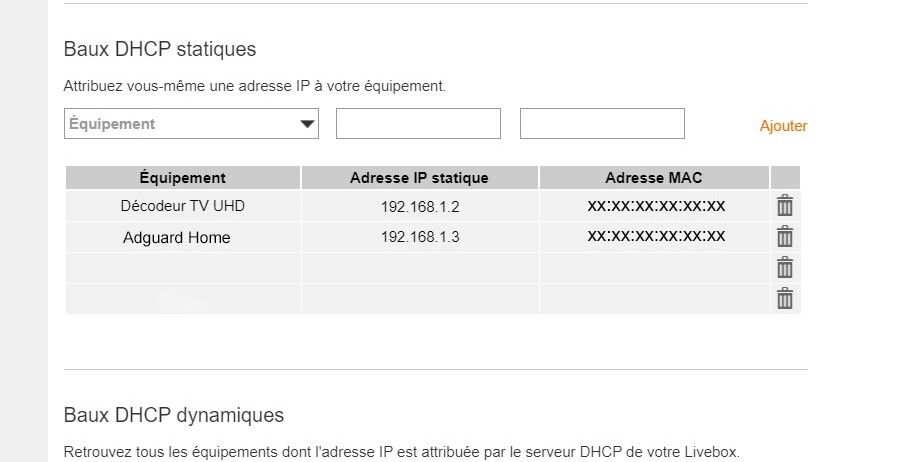
This ensures that only these two devices receive IP addresses from the Orange router.
2. Block the TV Decoder from Accessing AdGuard's DHCP Server
To prevent the TV decoder from connecting to the wrong DHCP server, I used iptables on the Raspberry Pi:
sudo iptables -I INPUT -m mac --mac-source XX:XX:XX:XX:XX:XX -j DROP(replacing XX:XX:XX:XX:XX:XX with the MAC address of the TV decoder)
3. Configure AdGuard Home's DHCP Server
In the AdGuard Home web interface, I configured the DHCP settings:
- Navigated to Settings → DHCP Settings
- Set the following parameters:
- Gateway IP: 192.168.1.1 (Orange router IP)
- IP range:
- Start: 192.168.1.4
- End: 192.168.1.100
- Subnet mask: 255.255.255.0
This creates a functioning DHCP server for all other devices on the network, with IPs above those assigned by the Orange router.
4. Make iptables Rules Persistent
To ensure the configuration survives Raspberry Pi reboots:
-
Installed iptables-persistent:
sudo apt install iptables-persistent -
Saved the current iptables rules:
sudo iptables-save > /etc/iptables/rules.v4
sudo iptables-save > /etc/iptables/rules.v6
This setup creates a clever split: the TV decoder gets its IP and DNS settings from the Orange router (maintaining TV functionality), while all other devices get their settings from AdGuard Home (enabling ad blocking).
Results
After deployment, I've enjoyed:
- 90%+ reduction in ads across all devices
- Faster page loading and reduced bandwidth usage
- Secure access to my home network from anywhere
- Protection from tracking and potentially malicious domains
- Enhanced privacy for all connected devices
This project combines networking, Linux administration, and security concepts to create a practical solution for everyday problems.